Welcome to TrainingPeaks! We’re excited to be part of your athletic journey. Let’s get you set up in the app to get you going in these four easy steps to get your account started.
1. Configure Your Zones
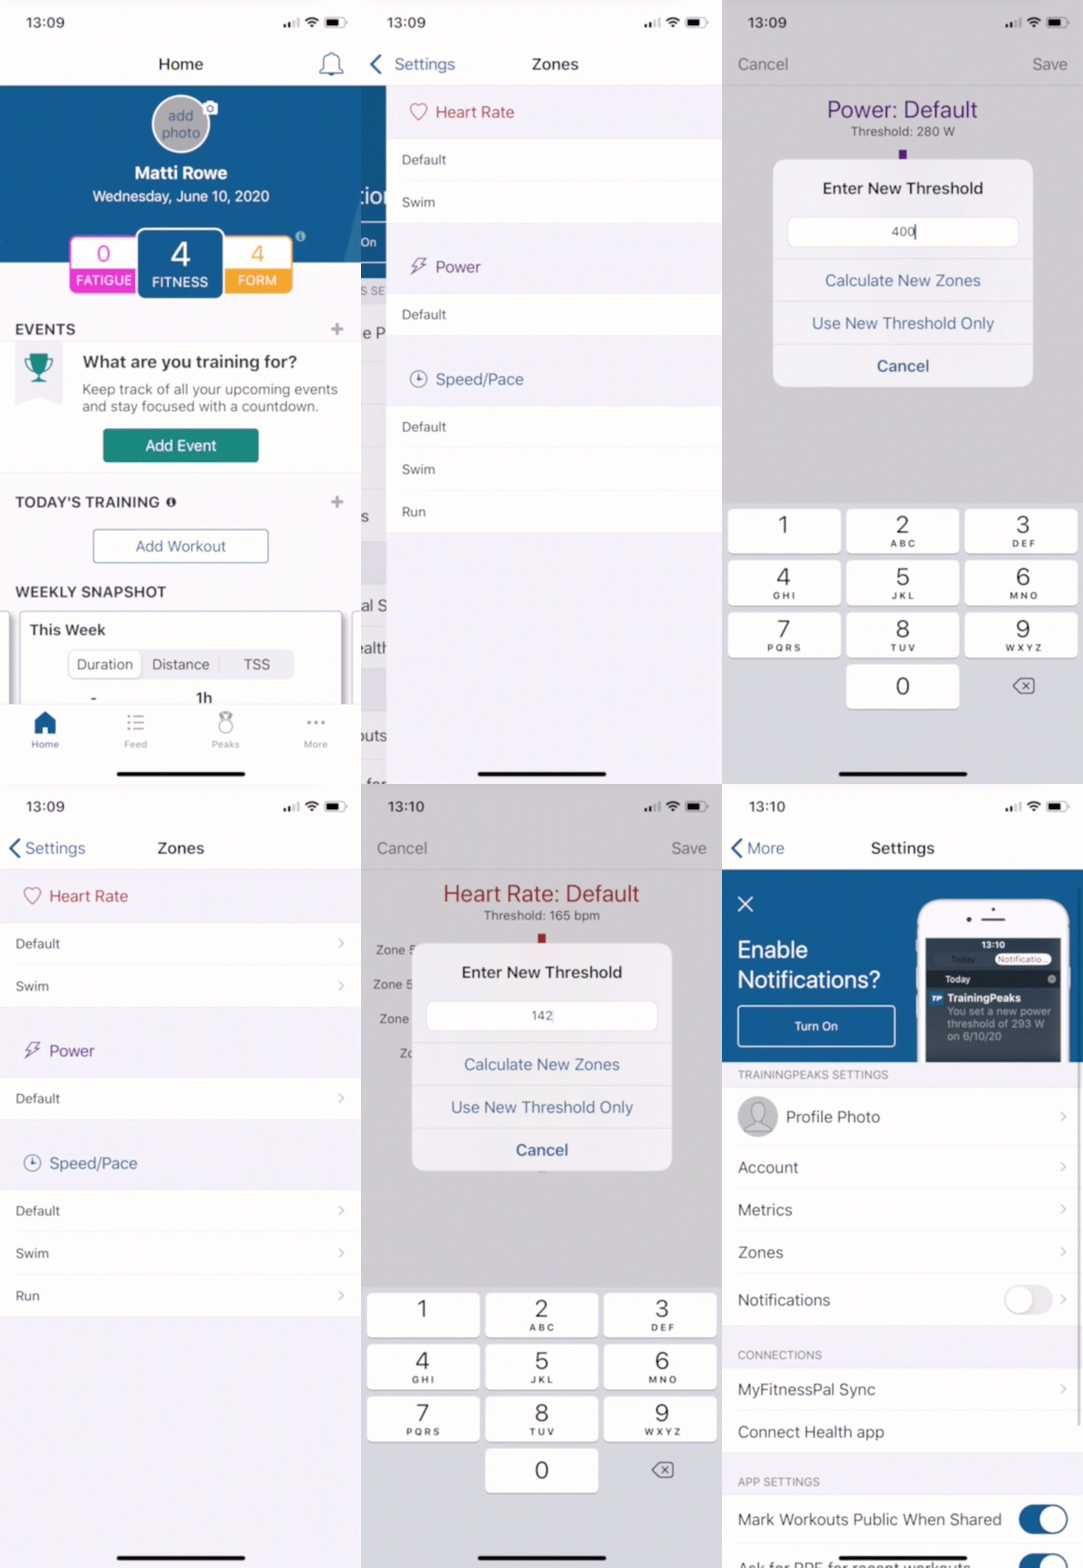
If you’re not sure about your thresholds, that’s OK. Read this article about how to estimate your thresholds. Setting your thresholds enables TrainingPeaks to populate charts correctly so you can see your fitness trends.
Start with going to the ‘hamburger’ button at the top left of your screen. Click and select ‘Settings’ to find ‘Zones.’ For full details on setting thresholds, visit this help page.
2. Add Your Goal/Race
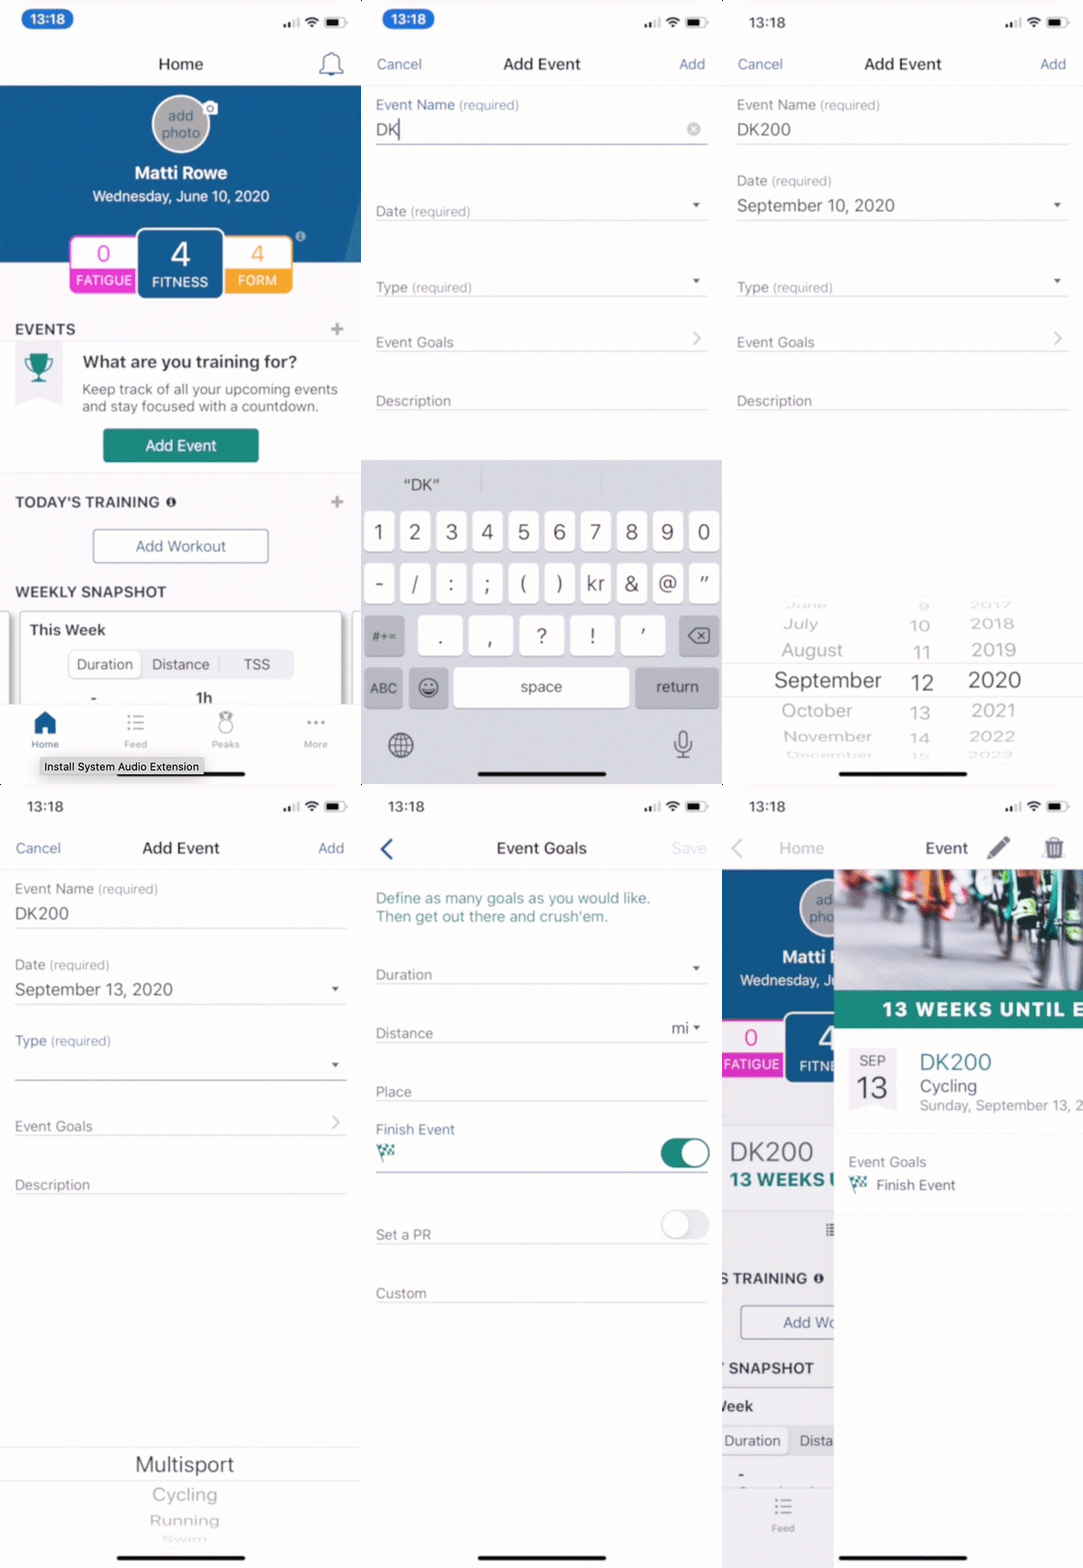
Now it’s time to add your goal event — typically, this is the race you’re training for. Click the home screen and select the ‘Add Event’ button. Fill out the fields and click ‘ADD’ on the top right.
3. Add a Workout
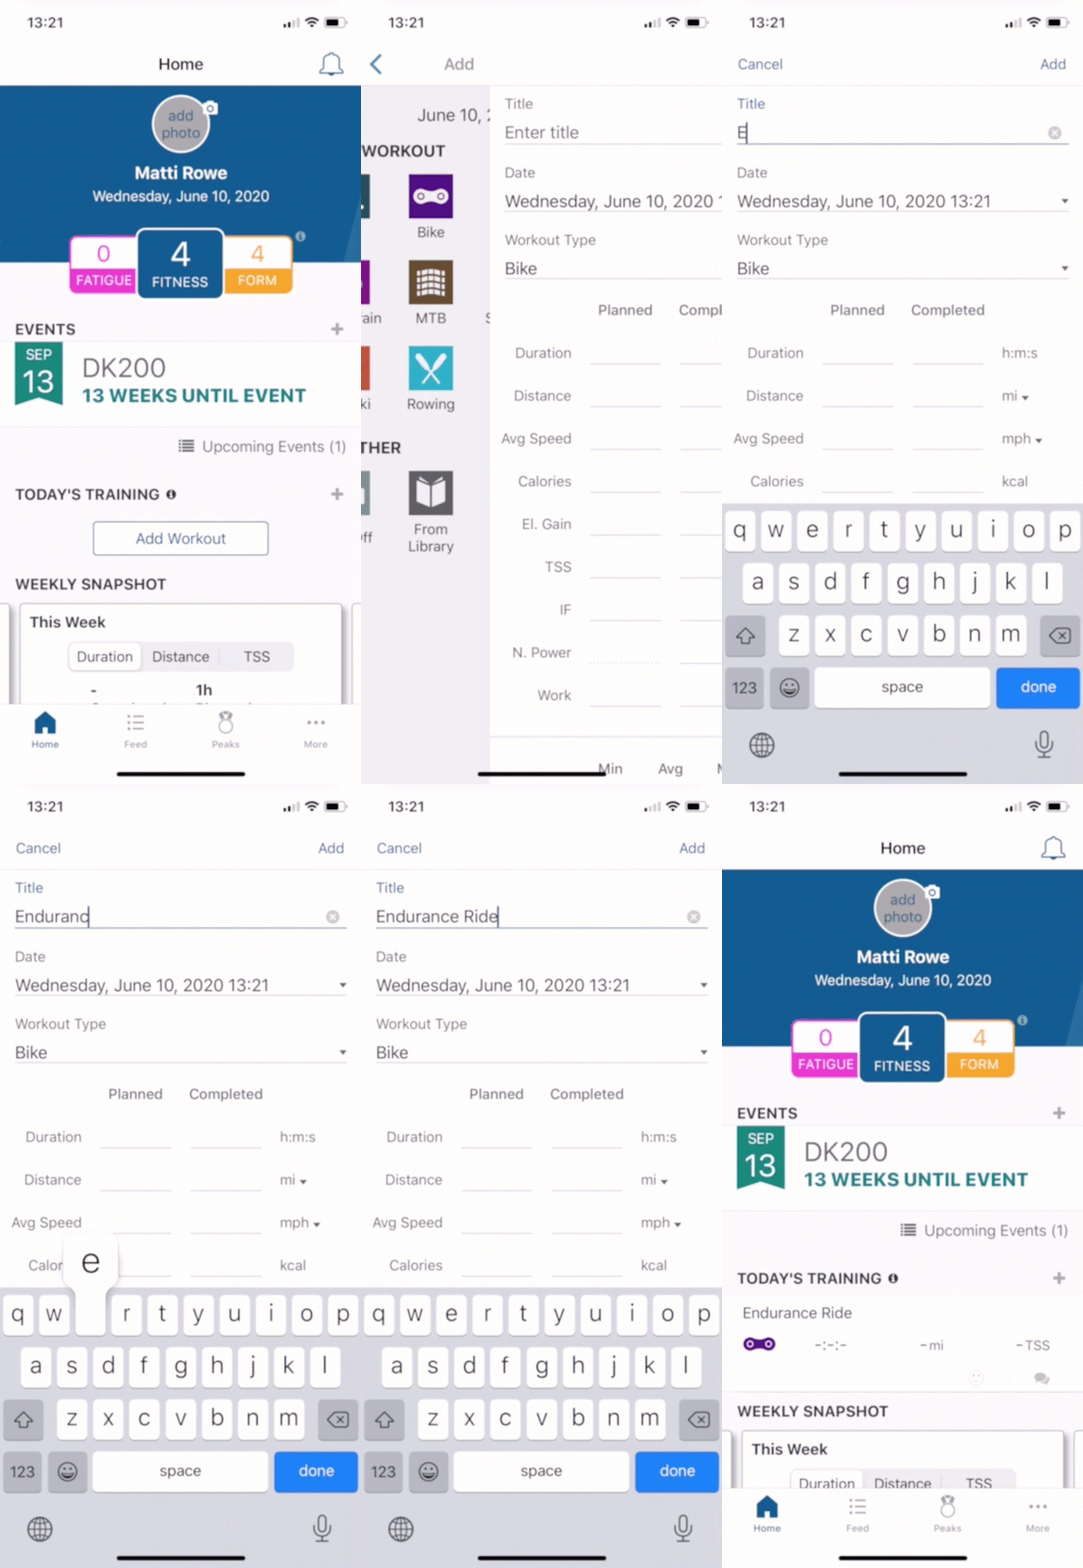
Next, add a workout. From the home page, click the ‘Add Workout’ button and fill out a title and planned values. Click ‘ADD’ when you’re finished.
4. Connect Your Device
Before you get out and train, the last step is to get your device to sync files with TrainingPeaks. Click the ‘hamburger’ button at the top left of your screen. Next, click ‘Apps & Devices’ to find a list of compatible apps or devices you use to record. Click the desired app or device and complete the connection.
Now get out the door (or indoors) and train. Once you’re finished, your workout will upload to TrainingPeaks, and you can click on the workout card and see an overview of your metrics, including your workout summary, peaks and TSS.
As you add and complete more workouts, keep logging in and clicking the charts tab to see your fitness progress and stay on track for your event.


