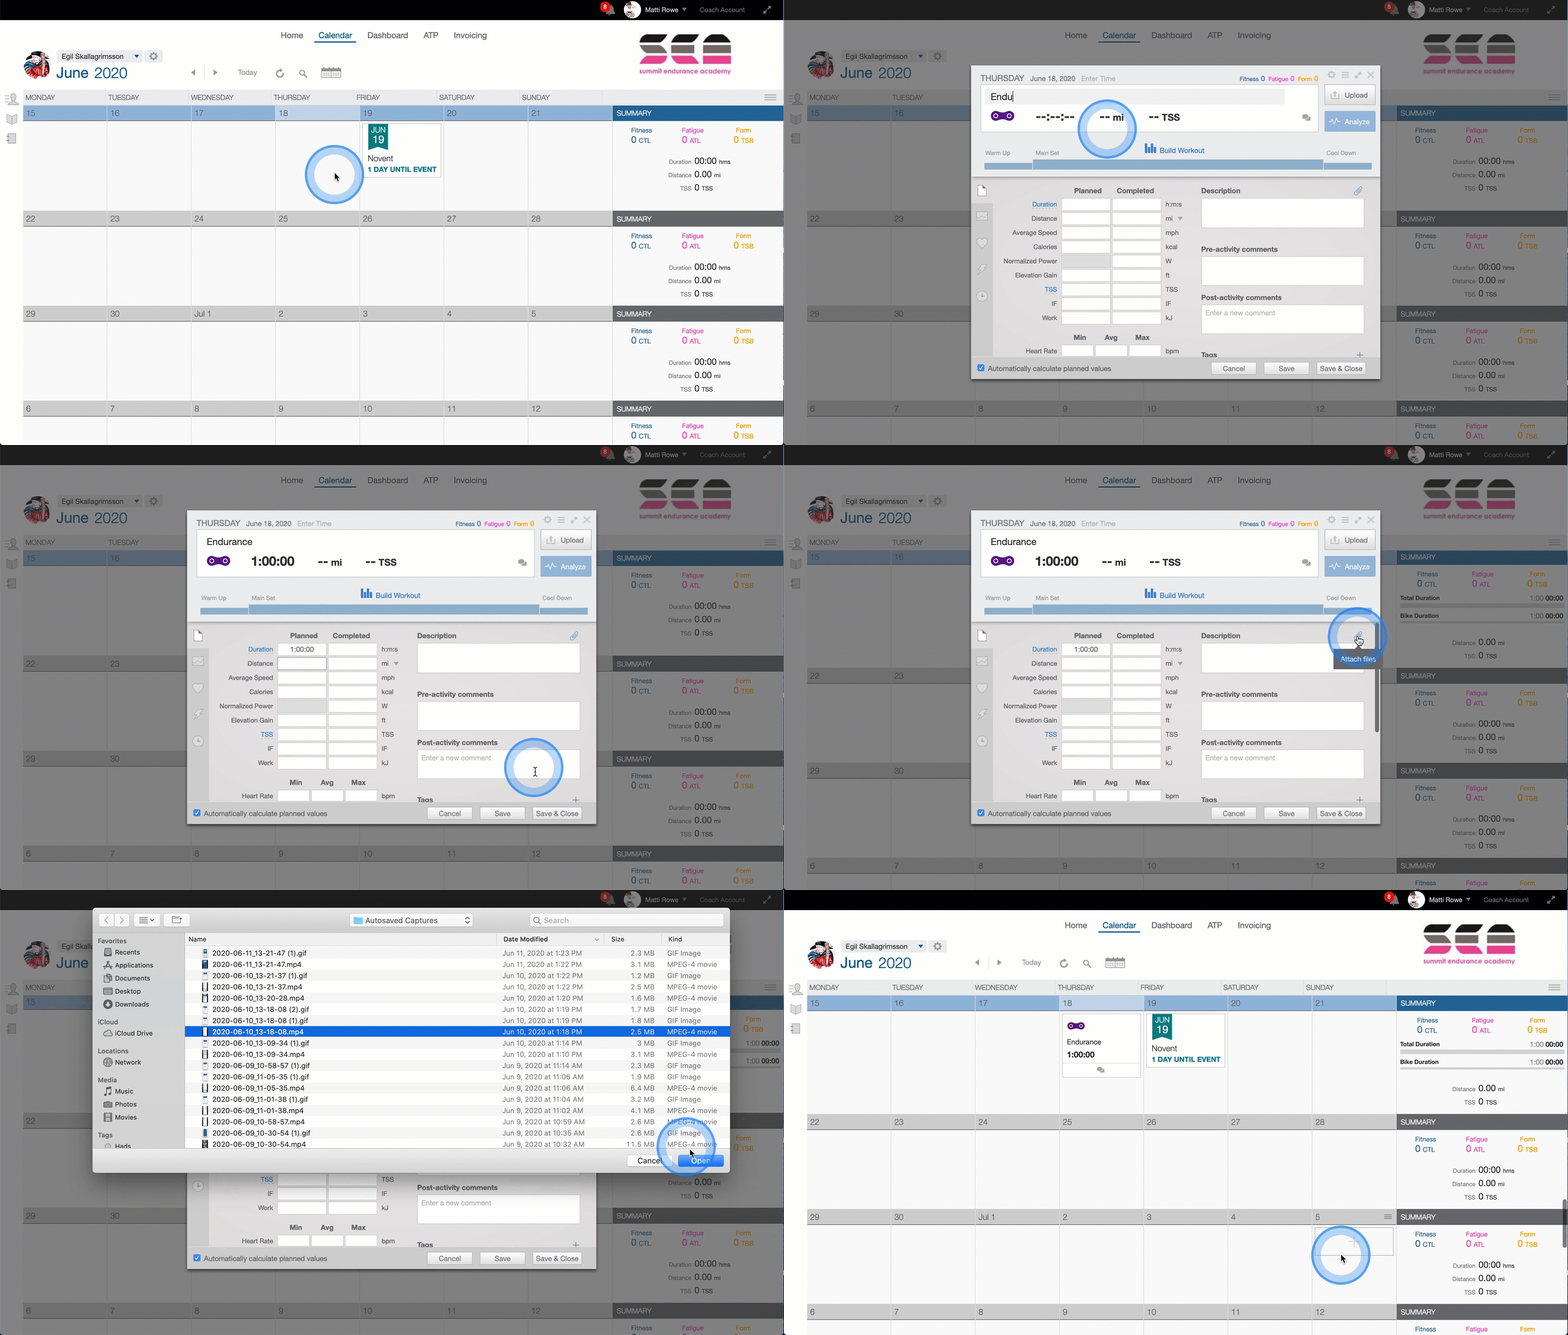
There are two ways that you can upload attachments (documents, pictures, short videos) to your workouts.
Add an Attachment to An Existing Workout 
- Click the workout to which you want to add an attachment. The Quick View will appear.
- In the Quick View, click the blue paperclip to the right of the Description.
- Browse for the file you wish to attach. Please note the upload limit is 22 MB.
- If successful, the attachment appears directly under the Description as a hyperlink.
- To download the attachment for viewing, click the hyperlink.
- If you would like to delete an attachment that has been uploaded to a workout, hover your cursor over the Description and click grey 'X' icon on the far right.
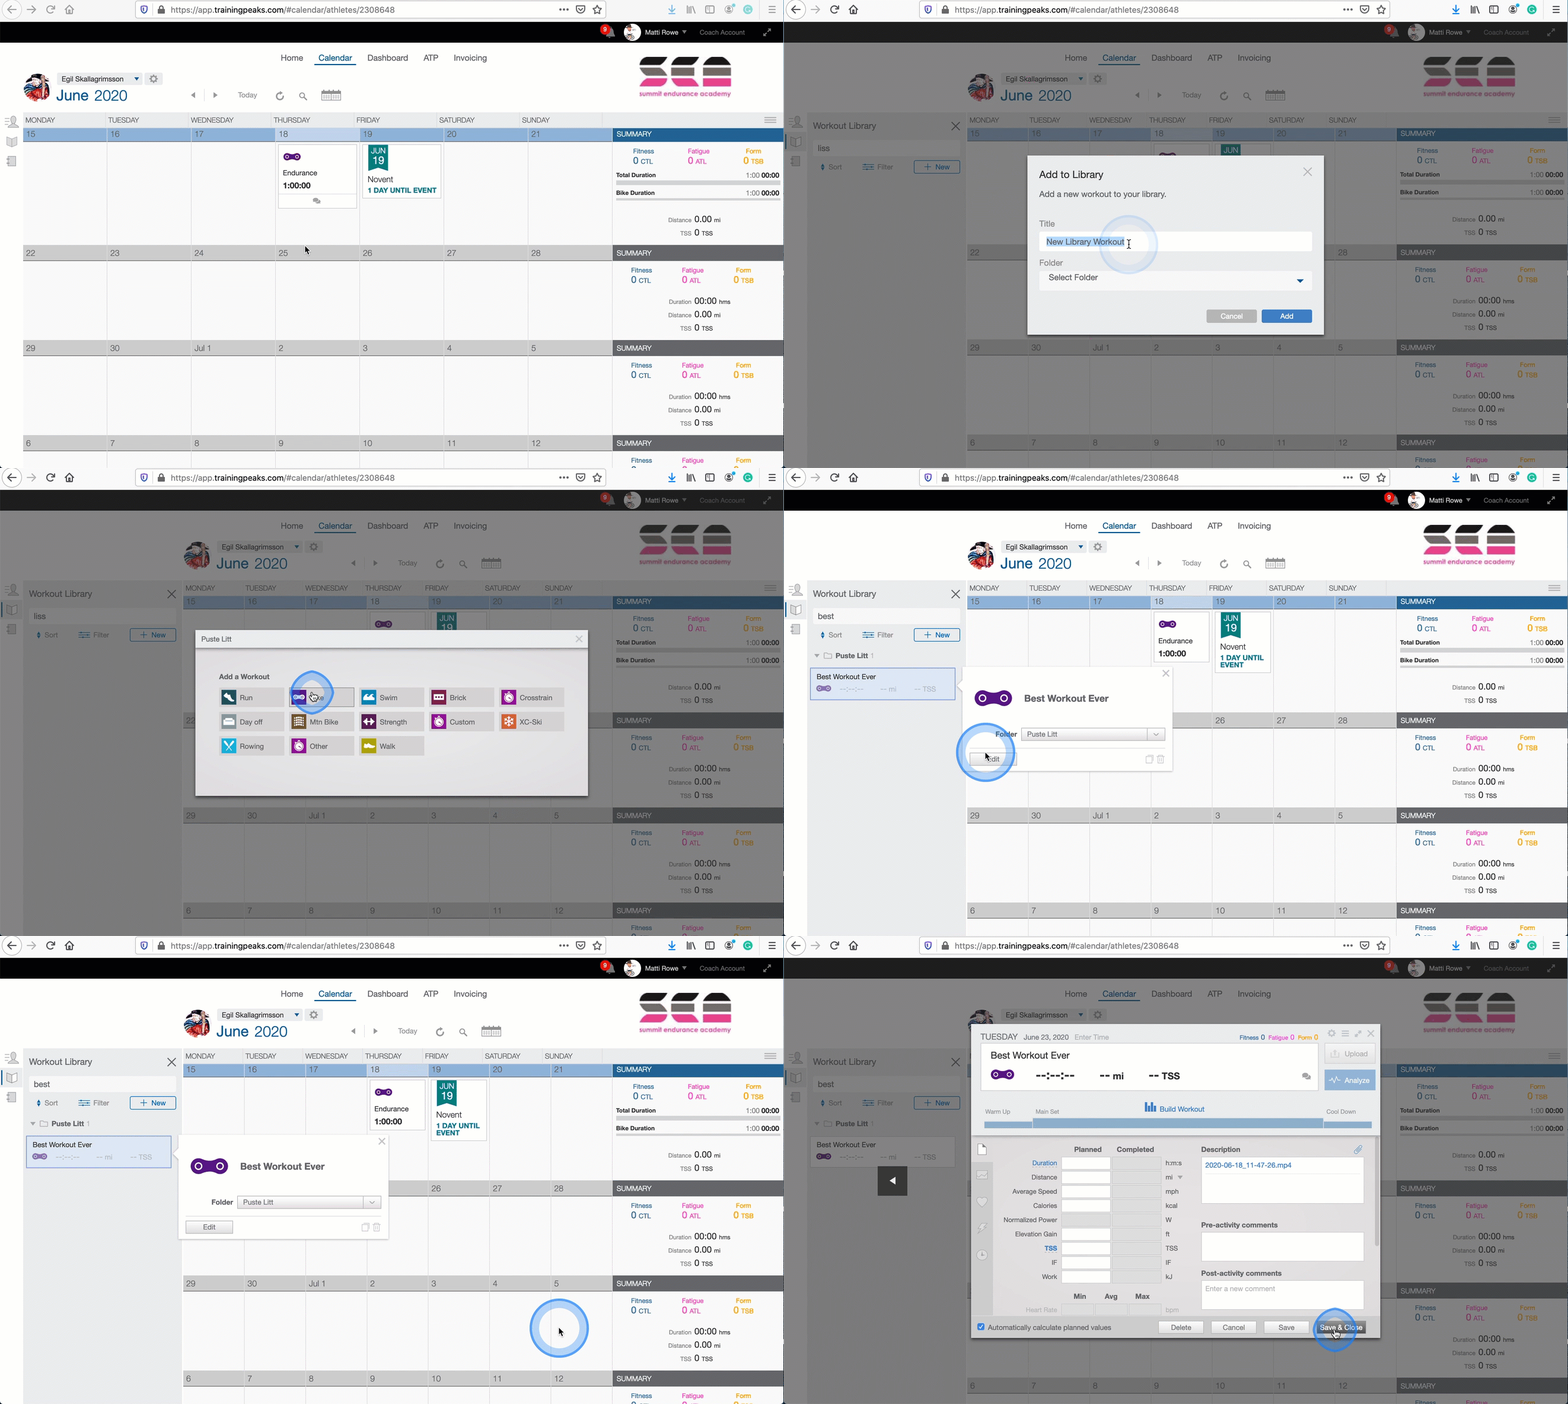
Add the attachment to a workout library workout
- Open the workout library that contains this workout you'd like to add an attachment to.
- Click on the workout and then the 'Edit' button (as shown below).
- In the Quick View that opens, click the paperclip (upload attachment) and then browse for the file you wish to attach.
- The uploaded file will now be attached to this workout within your library. When this workout is added to an athlete's calendar, it will contain this attached file.
- Whenever you drag and drop the workout from the workout library to a TrainingPeaks calendar the attachment will be included.
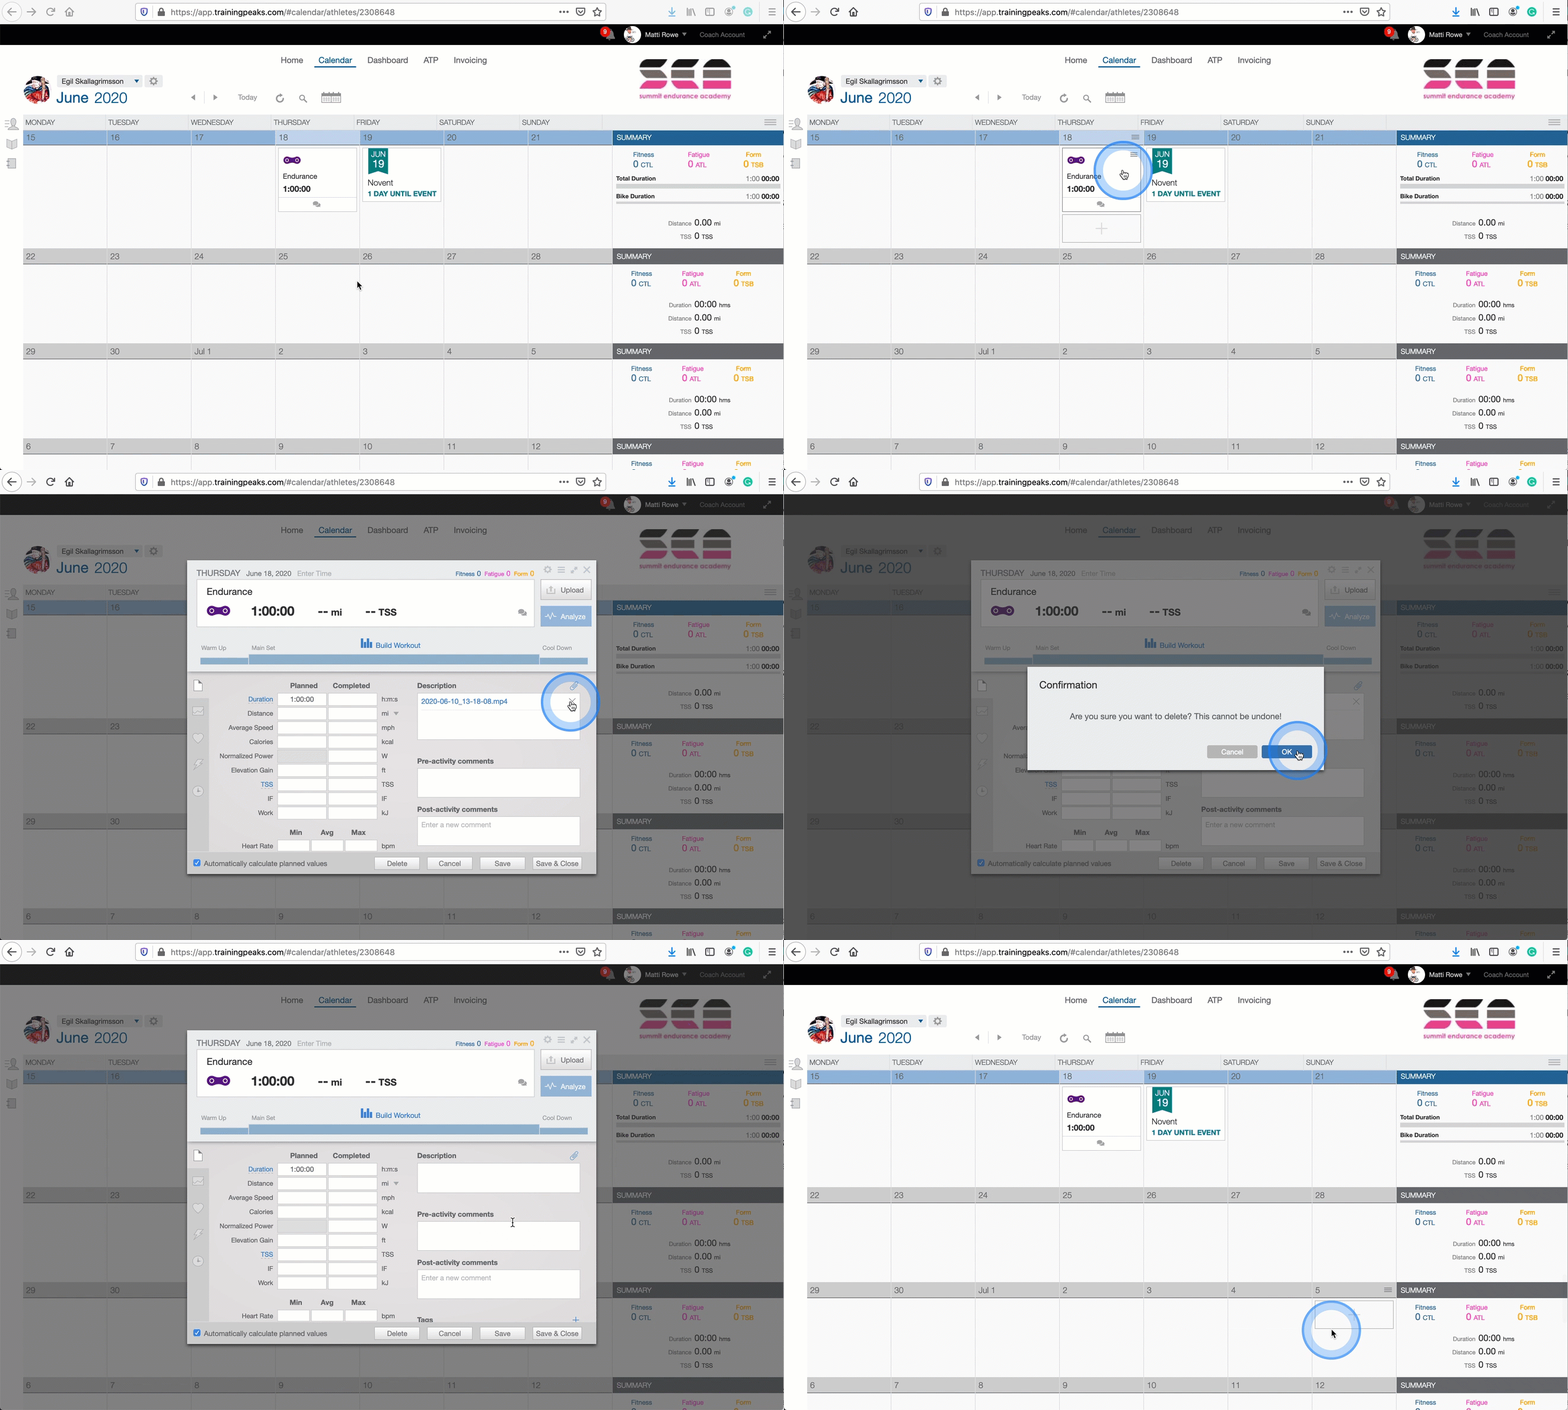
Remove an Attachment
- Open the workout that contains the attachment you wish to remove.
- Hover your cursor over the blue hyperlink
- You will see a grey 'X' icon appear. Click that
- A pop-up window will appear prompting you to confirm the attachment deletion. Click 'OK'.
- If removed successfully, it will no longer appear under the description.

